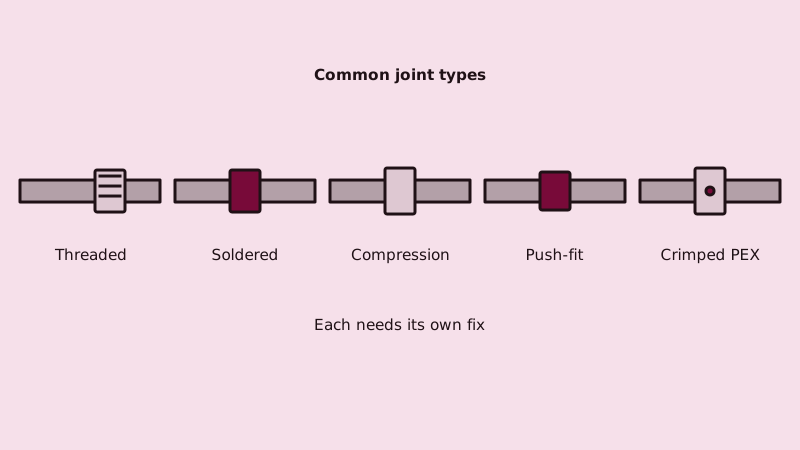
Water off comes first. Then work out the joint's material: threaded steel or brass, soldered copper, compression, push-fit, glued plastic or a PEX clamp. Each gets a different repair, and a wrong move turns a drip into a spray. For the bigger picture of tracking down leaks, start at leaks and burst pipes.
Why does a pipe joint start to leak?
Seals age, threads corrode, solder cracks from movement, glued joints were never fully seated, and fittings loosen as pipes swell and shrink with temperature. High pressure accelerates all of it: California's plumbing code (608.2) caps building supply at 80 psi, and readings above that make joint failures much likelier.
Water chemistry matters too. Mineral crust around a threaded joint can hide a weep for months, and corrosion where unlike metals touch eats a fitting from outside. According to EPA, leaks drain over 9,300 gallons yearly from a typical home, so a joint dripping once a second is more than a nuisance.
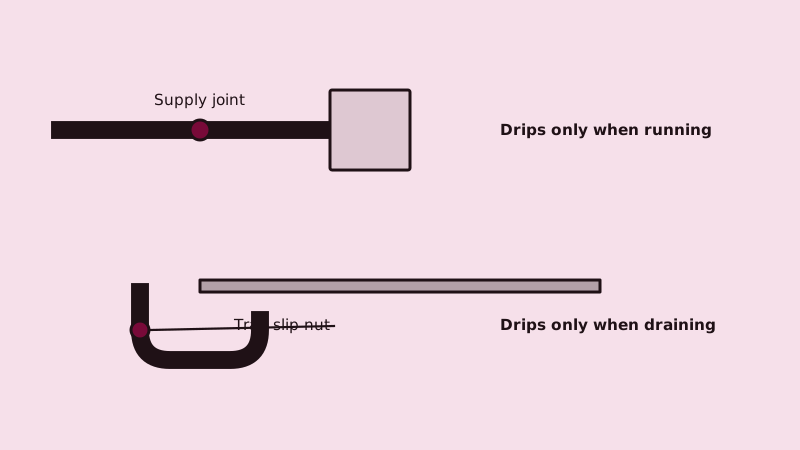
Look for the pattern: a drip that only appears when a fixture runs often points to a supply joint, while one that only shows when you drain a sink points to a trap or drain joint, where a loose slip nut or crushed washer is typical.
Which joint leaks need a plumber?
Ask for one if the shutoff will not hold, the joint lies in a wall cavity, a ceiling or a slab, the pipe is corroded around the fitting, soldering is needed and unfamiliar, the leak returns after your fix, or the fitting belongs to a gas line. Gas piping never belongs on a DIY list.
If you smell gas, leave at once and dial (800) 427-2200 for SoCalGas when you are outside; real danger means 911. For water leaks, file the price request form and attach photos, the pipe material and the location, and we'll have a local plumber quote the work.
What is the fix for each type of joint?
For threaded steel, close the water and tighten the joint a quarter turn, then re-seal with fresh pipe dope or PTFE tape if it still weeps. For solder, compression and push-fit joints the fix is to remake the joint with a new fitting. For glued plastic and PEX clamps, the fitting is cut out and replaced.
- Threaded (galvanized, brass, black iron): back it off, clean the threads with a wire brush, wrap PTFE tape clockwise three to four turns or use pipe dope, and snug it up. Overtightening cracks fittings, and a cracked fitting leaks worse. If the pipe is badly corroded, replace the section.
- Soldered copper: drain the pipe fully, since water prevents the solder from flowing. Clean the pipe and fitting to bright metal, apply flux and heat with a torch. Use lead-free solder for drinking water. First-timers should hand this one over, since an open flame beside wood framing is a fire hazard.
- Compression fittings: nudge the nut a quarter turn; if it still weeps, cut back to clean pipe and fit a fresh ferrule and nut.
- Push-fit (quick-connect): check that the pipe is fully inserted to the depth mark and that the pipe end is square and smooth. A cut or deburred end often cures a leak. Release the collar with the manufacturer's tool and reseat it.
- PVC and CPVC glued joints: these do not repair by tightening. Cut the joint out, install new couplings with the right solvent cement, and wait out the label's cure time before restoring pressure.
- PEX with a crimp or clamp ring: cut the fitting off and make a new connection using the matching tool and ring. See water leaks in plastic pipe for PEX and plastic specifics.
Drain joints such as a sink trap are simpler: dry them, snug the slip nut by hand with a bit extra, and inspect the washer. Steps appear in repairing a leak under a sink.
What if the joint is concealed in a wall or ceiling?
Then this is no casual repair. Opening drywall, cutting pipe and remaking the joint takes tools, a dry line and the skill to patch afterward, and a mistake can flood the cavity. Shut off the water, circle the stain in pencil and find a plumber able to locate the joint without tearing out more than necessary.
Hidden joint leaks show up as a damp spot that keeps growing, blistered paint, a musty odor, tiles that stay warm, or a faint trickle at night. The meter test helps: jot the reading, leave every fixture off through a two-hour wait and compare. EPA describes this check, and movement suggests water is escaping.
Work in walls and ceilings is exactly where state contractor licensing and permits tend to apply, so check any contractor against the CSLB database first.
What does a leaking joint cost to repair?
One guide lists a joint or coupling leak behind drywall at $300-$900, about $550 typical, and an accessible pinhole in exposed copper at $150-$400. A visible burst pipe is $500-$2,000. These are national averages; drywall repair and painting are often billed separately, and a bid for your own house is the number that counts.
The number moves with reach, with the hours spent finding and fixing the joint, and with whether a section or the whole run needs replacing. One weeping joint on a visible line is a short visit; a leak behind finished walls adds opening and closing costs. More on pricing is in leaking water pipe repair.
What stops the water until I can fix it properly?
Close the fixture's stop valve or the main, let the line empty through a low faucet or hose bib and towel the joint dry. For a quick, temporary hold, wrap it in self-fusing silicone tape or press on some epoxy putty. A repair clamp suits straight pipe, not fittings.
Temporary means temporary. Epoxy putty cures in minutes and can hold light pressure, but a joint that has leaked once still needs the real fix. If water sprays, soaks drywall or reaches electrical equipment, keep the supply off and phone for help instead of pushing on.
Set a bucket beneath, take photos and jot down the pipe material; those help a plumber judge the job before arriving. When a joint is out of reach, slab leak repair cost shows what hidden and buried leaks tend to run.
Common questions
How many minutes or hours should I plan for?
Tightening a threaded joint takes minutes. Replacing a coupling on exposed pipe takes roughly an hour once the line is shut off and drained. Soldering needs a dry pipe plus cooling time, glue and epoxy add cure time, while a concealed joint also needs the wall opened and closed.
What do I ask a repair contractor?
If they will fix only the joint or replace a section, whether drywall repair is included, the minimum charge and any warranty on the work. Confirm the contractor license through the CSLB, and see the figure on paper before any cutting starts.
Should I be home during the work?
Yes, or a grown-up you trust. They show the water main and the leak, and agree to the plan. Warn the household if the water will be out for a spell, and clear belongings from the wall or floor being worked on.
Can tape or epoxy be the permanent answer?
PTFE tape seals threads and belongs in a proper threaded repair. Epoxy putty and silicone tape are stopgaps on most house plumbing. A soldered, glued or compression joint that leaks calls for a proper remake rather than a patch; ask the plumber which approach fits.
This guide is one of many on plumber whittier.